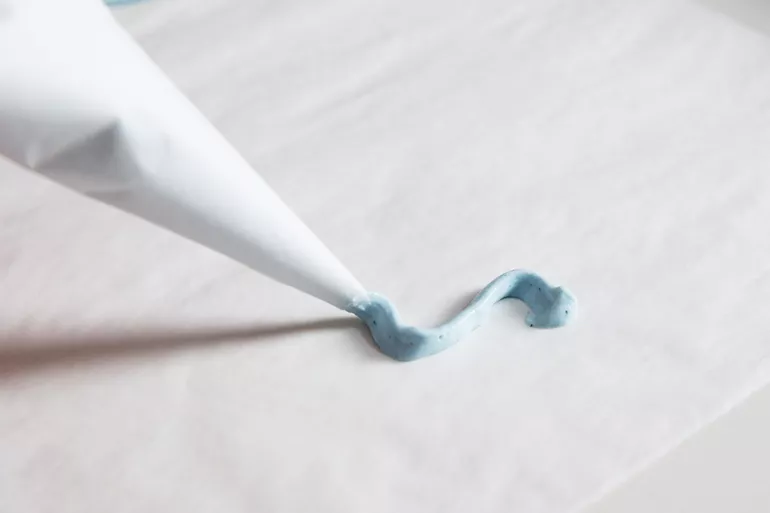
If you’re planning to do a lot of holiday cookie decorating and don’t want to spend a lot on plastic piping bags and tips, parchment piping bags are the perfect solution. They’re inexpensive, disposable, and can be sized larger or smaller according to the size of the job. When used without a piping tip, parchment piping bags, sometimes called parchment cones, give the user a lot more control. Plus, you’ll need a lot of them for next week when we share the white chocolate tree DIY seen here.
Don’t purchase pre-cut parchment triangles. They’re more expensive than parchment sheets or rolls, and are way too big for smaller jobs. (Of course if you insist on using the parchment triangles, you can cut them into smaller triangles. See Option below.)
STEP ONE: CUT
Fold one corner of parchment until it meets the other side. Crease the seam and you’ve created a triangle. Carefully cut along the seam, making the cut as straight as possible, to create your parchment paper triangle.
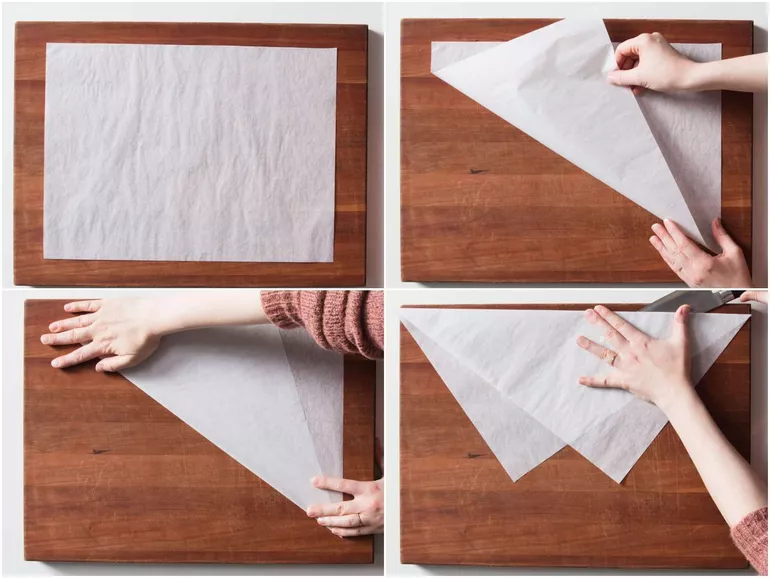
Option: If your triangle is too large, you can further fold it to make smaller triangles. Repeat as necessary until your triangle is as small as needed.
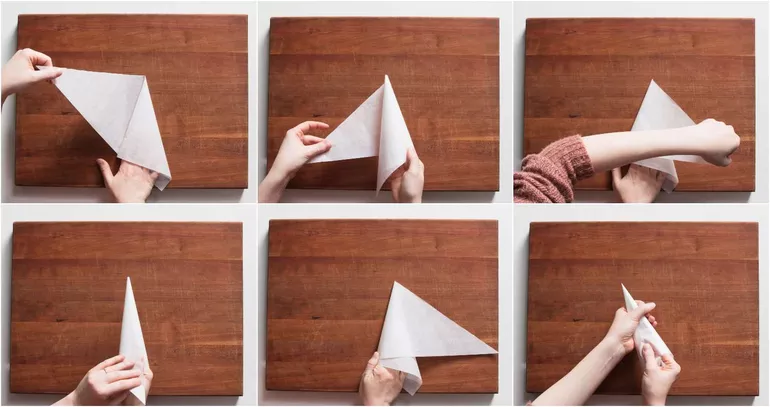
STEP TWO: FOLD
Here, we’ve labeled the three corners (A, B, C) of our parchment triangle and color coded it to reduce confusion. The side that’s face-up is the blue side. The side that’s face-down is pink, so that when we flip over a corner, we see the pink side. (If you need to practice, you can label and color code your corners with a marker.)

Lay your parchment triangle on a flat surface with point C facing you. It’s always a little counterintuitive to create a parchment piping bag because it seems like point C should be the tip of your bag, but the tip actually ends up being the midway point between A and B on the side opposite point C.
Using your left hand (or your right hand if you’re a lefty) fold point A in towards point C so that the pink side is now face up.
Continue folding point A into itself so that the blue side is now face up and point A is very close to point C.
Pull point A up and past point C to create a tightly closed tip at the opposite end.
Hold point A and C together in your left hand (or right hand if you’re a left) and begin wrapping point B over to the left (or right if you’re a lefty). Continue wrapping point B all the way around until the blue side is showing.
STEP THREE: SECURE
Pull points A and B in toward you until the tip (shown at the top of the photo) is tight.
To secure piping bag, fold point B inward.
Your piping bag is now ready! You can cut the end to create a tip as large (or small) as needed. To insert a piping tip, cut about 1/2″ off the bottom and drop a metal tip in.
Enjoy!